

DIY Video Doorbell Installation Guide for Beginners: The Foolproof Method Pros Don’t Want You to Know
Quick Glimpse: You don’t need to be an electrician—or even particularly handy—to install a video doorbell that protects what matters. With the right device and a little guidance, your front door can be smarter (and safer) in under an hour.
Why Everyone’s Talking About DIY Doorbells
You’ve probably noticed more of those sleek little devices perched beside doorways lately. They blink, they chirp, and they stream live footage straight to someone’s phone.
 What was once a luxury is now a necessity—and people are catching on fast.
With the cost of professional installation climbing and peace of mind becoming priceless, many are asking the same question: Can I do this myself? The answer—resoundingly—is yes.
Installing your own video doorbell is about more than saving a few bucks. It’s about control. About claiming ownership of your space and taking an active role in your security. And once you’ve done it, you’ll wonder why you ever considered paying someone else.
Step One: Picking the Right Doorbell (Without Getting Overwhelmed)
Not all video doorbells are created equal. And as a first-timer, the last thing you want is a complicated system that turns your Saturday into a six-hour saga.
Ask Yourself:
- Are you renting or do you own?
- Is there an existing doorbell wired into the house?
- Do you mind paying monthly for cloud storage, or do you prefer local options?
Great Beginner Options:
- Battery-Powered Favorites: Eufy 1080p, Blink Video Doorbell—both are intuitive and hassle-free.
- Wired, If You’re Up for It: Ring Pro 2 or Google Nest Hello for a more permanent setup.
These choices shine in terms of simplicity, clarity, and support for beginners. Plus, they offer just enough features to feel futuristic—without crossing into overwhelming.
Look For:
- Night vision that actually works
- Two-way audio (because shouting through the door is outdated)
- Motion alerts with custom zones
- Integration with Alexa or Google Home for voice-controlled magic
Heads up: Renters will love adhesive mounts and no-drill options—zero damage, all the smarts.
Step Two: Gather What You’ll Need (Spoiler: You Already Own Most of It)
You won’t be rummaging through a toolbox for hours. If you can screw in a hook or peel off a sticker, you’re more than qualified.
- Phillips-head screwdriver
- Smartphone with the doorbell app pre-installed
- Optional: a drill and a level (only if you’re going for a more permanent mount)
Most kits come fully loaded: mounting hardware, anchors, maybe even a mini-level. And if you don’t have a drill? No problem. Adhesive mounting kits work like a charm.
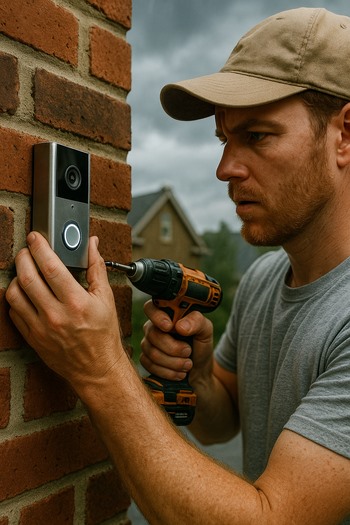
Step Three: Your Foolproof, Beginner-Friendly Install Walkthrough
Let’s demystify this. Here’s how it unfolds, minute by minute.
1. Charge Up
If your doorbell runs on a battery, give it a full charge before you even think about mounting. Trust me—it’ll save you a redo.
2. Wi-Fi Check
Stand at your front door with your phone.
3. Pick the Spot
Eye-level is ideal, but consider your home’s quirks.
4. Mount the Bracket
Whether you’re drilling or using adhesive, take your time here. A crooked doorbell is surprisingly annoying.
5. Connect to the App
Most models use QR codes—scan, sync, and let the app do its thing. You’ll have a live feed in minutes.
Step Four: Dial In the Settings That Make It Yours
Here’s where the magic happens. Most people stop at “it works”—but you? You’re going further.
Unlock These Smart Features:
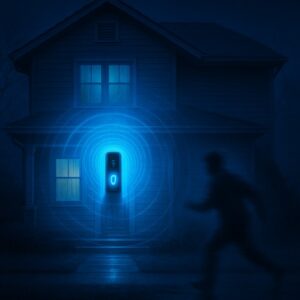
- Define your motion zones so your phone doesn’t buzz every time a leaf blows by
- Turn on night mode (bonus: some models do it automatically)
- Adjust the sensitivity so you’re alerted when it matters—not when a cat strolls past
Share Access:
Live with someone? Grant them access via the app. Most systems allow multiple users, so no one misses an important alert.
Bonus: Some apps let your doorbell announce visitors through your smart speaker. It’s like having a personal butler, minus the tux.
Step Five: Don’t Panic—Here’s How to Fix the Glitches
 Every tech tool has its moments. A doorbell is no exception. But here’s the good news: almost every hiccup has a simple fix.
The Usual Suspects:
- Won’t connect? You might be too far from the router. Move it closer or try a Wi-Fi extender.
- Laggy video? Lower the stream resolution or limit alerts.
- Battery draining fast? You may have high sensitivity turned on. Pull it back and watch your battery bounce back.
Oh, and always check for firmware updates.
Bonus Moves: Take Your Setup to the Next Level
Once your doorbell is up and running, why stop there?
Upgrade Ideas:
- Add a smart lock so you can let guests in remotely
- Install indoor cams to complete the ecosystem
- Use motion-triggered lights for added deterrence
- Create automations: when someone rings, turn on porch light + send phone alert + announce on speaker
The goal? A seamless system where every device talks to the others. You become the quiet conductor of a smarter, safer home.
Wait—What About…? (Real Questions, Real Talk)
How long will this take me?
Honestly? If you’re not rushing, give it 45 to 60 minutes. Take breaks, enjoy the process.
Can I install it without tools?
Totally. Adhesive kits work beautifully for battery-powered units. No holes, no landlord complaints.
What happens if the Wi-Fi goes out?
You won’t get live video, but most systems store footage locally or sync once Wi-Fi returns.
Am I allowed to record people outside my house?
Usually, yes—especially if it’s your property. But audio laws vary, so check your local privacy rules to stay on the right side of things.
Products / Tools / Resources
- 1080p Video Doorbell – A favorite for renters: sleek, easy to install, no monthly fees.
- Blink Video Doorbell – Affordable and Amazon-backed, with great battery life.
- Ring Pro 2 – Great for homeowners ready for a wired setup and deeper features.
- Google Nest Hello – Excellent video clarity and facial recognition, perfect for Google Home users.
- TP-Link Wi-Fi Extender – Solves weak signal issues in minutes.
- 3M Adhesive Mounting Strips – No drilling needed, rock-solid hold on most surfaces.
- Phillips Screwdriver Set – Your MVP for nearly every smart home project.
- August Smart Lock – Adds remote entry to your security stack.
- Eufy Indoor Cam – Inexpensive way to extend your camera coverage indoors.
- Smart Light Bulbs (Kasa or Philips Hue) – Sync with doorbell events for instant illumination.
0 Comments